

- Why Preparation is Key to Successful Deck Installation
- Planning Your Deck Installation
- Choosing the Right Decking Materials for Your Deck
- Preparing the Site for Deck Installation
- Gathering Tools and Materials
- Scheduling Professional Help
- Final Pre-Installation Checklist
- Common Preparation Mistakes to Avoid
- Finishing Touches
- Maintenance and Upkeep
- Preparing for Your Deck Installation
Proper preparation is the key to a successful deck installation. Knowing how to prepare for a successful deck installation is essential, as a deck is not just a structure; it’s an extension of your home, providing a space for relaxation, entertainment, and added property value. By planning ahead, including a thorough deck design that covers the overall planning and layout, you ensure a smoother process, reduce unexpected costs, and guarantee a long-lasting, high-quality deck. This guide covers everything you need to know before starting—from setting goals and budgeting to understanding permits, selecting materials, and preparing the site.
Whether your goal is to create an outdoor dining area or a cozy retreat, following these steps will help you approach the project with confidence and clarity.
Why Preparation is Key to Successful Deck Installation
Before diving into construction, understanding the importance of preparation sets the foundation for success. Concrete footings are crucial in providing stability and preventing future issues such as shifting or settling. Thorough preparation makes the installation process more efficient and helps prevent delays, budget overruns, and potential code violations. Planning allows you to address potential challenges proactively, such as drainage issues, uneven terrain, or complex designs.
Data from the National Association of Home Builders shows that proper planning reduces unexpected issues by up to 50%, making the build more likely to be completed on time and within budget. Taking the proper steps immediately ensures your deck will be safe, durable, and aligned with your vision.
Planning Your Deck Installation
Defining Your Deck’s Purpose
The first step in preparation is clearly defining your deck’s primary purpose. This is more than just deciding between a dining area or a relaxing space—it’s about understanding the activities you envision for your deck. This clarity will inform crucial decisions about size, layout, and specific features:
- Outdoor Dining: If your deck is primarily used for meals, you’ll need space for a dining table, chairs, and possibly a built-in grill or outdoor kitchen. An open, spacious layout with weather-resistant furniture is essential.
- Relaxation Retreat: For those seeking a quiet retreat, design elements like privacy screens, comfortable seating, and shade structures (e.g., pergolas or umbrellas) should be considered. Adding planters or a small garden around the deck can enhance the ambiance.
- Entertainment Hub: If you love hosting gatherings, you might want a larger deck with built-in seating, a fire pit, or a bar area. Make sure there’s enough room for people to move around comfortably.
A well-designed deck can transform your outdoor space into a functional area for relaxation, entertainment, and social gatherings, adding value to your home.
By aligning your deck’s design with its purpose, you ensure that it meets your lifestyle needs and delivers maximum enjoyment.
Setting a Realistic Budget
Budgeting is a crucial part of the deck preparation process. Costs can vary widely based on materials, size, and complexity. Here’s a breakdown of what to consider:
- Materials: Wood decking (e.g., pressure-treated wood, cedar) is often more affordable initially but requires regular maintenance. Composite decking, while more expensive upfront, offers low maintenance and more extended durability.
- Labor Costs: Professional installation costs can range from $15 to $45 per square foot, depending on the deck’s design, complexity, and location.
- Extra Features: Additional features like lighting, built-in seating, or outdoor kitchens will add to the overall cost. Plan for these extras in your initial budget to avoid surprises.
To avoid financial stress, set aside 10-15% of your budget as a contingency for unexpected expenses like repairs, additional permits, or unplanned features.
Checking Local Building Codes and Permits
Before you start any physical work, familiarize yourself with local building codes and obtain the necessary permits. This step is not just about legality—it’s about ensuring your deck’s safety and structural integrity. Key aspects to consider include:
- Setback Requirements: Rules dictate how far your deck must be from property lines, fences, and other structures.
- Railing and Guardrail Requirements: Codes usually specify the minimum height and strength of railings, especially for elevated decks. Installing sturdy posts at specific intervals along the deck perimeter is also essential to ensure stability and compliance with local building codes.
- Foundation Specifications: Regulations often detail the depth and type of footings required to support the deck’s weight and provide stability.
By adhering to these codes, you protect your investment and ensure the safety of everyone who uses the deck.
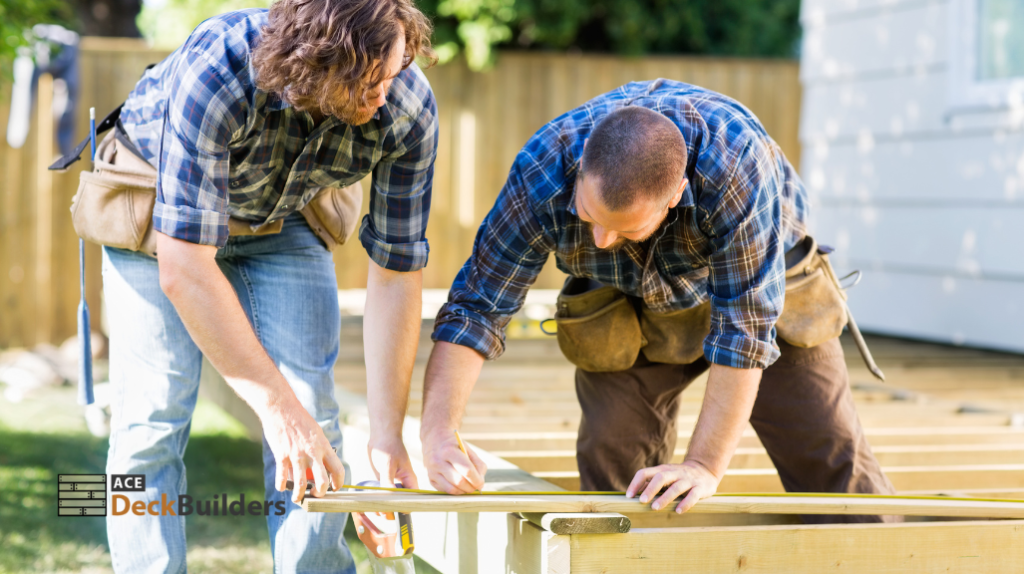
Measure the Site and Draw Your Plans
Measuring the site and drawing plans is crucial in the deck-building process. This step helps you visualize the final product, ensure accuracy, and make necessary adjustments before construction begins. To measure the site, use stakes and string to mark out the deck area, ensuring the corners are square and the dimensions match your design plan. Take note of any obstacles, such as trees, slopes, or neighboring buildings that may affect the deck’s design or construction.
Next, draw a detailed plan of your deck, including the location of footings, posts, beams, joists, and decking boards. Consider the deck’s purpose, size, shape, design, and local building codes and regulations. Many hardware companies offer basic deck building programs and calculators on their websites to help with planning and product selection. By measuring the site and drawing your plans, you can ensure a successful and stress-free deck building project.
Choosing the Right Decking Materials for Your Deck
Wood vs. Composite Decking
The choice between wood and composite decking affects the deck’s appearance, cost, and maintenance needs:
- Wood Decking: Offers a natural, classic look. It’s generally more affordable upfront but requires regular maintenance, including sealing, staining, and protection from pests and moisture. It can also be more prone to warping, cracking, and fading.
- Best for: Homeowners seeking a traditional look who don’t mind periodic maintenance.
- Composite Decking: Made from wood fibers and recycled plastic, it’s designed to be more durable and requires minimal maintenance. It resists warping, splintering, and fading, making it ideal for extreme weather conditions.
- Best for: Those looking for long-term durability, minimal maintenance, and resistance to moisture and UV rays.
Consider your budget, aesthetic preferences, and willingness to maintain the deck when deciding.
Selecting Weather-Resistant Options
Austin’s hot and humid climate requires materials that withstand intense sun exposure, heavy rain, and fluctuating temperatures. Consider the following:
- Pressure-treated wood: Affordable and resistant to rot and insects but requires regular maintenance.
- Cedar: Naturally resistant to decay and insects, cedar offers a warm, natural appearance and holds up well in the sun. However, it requires sealing to maintain its color.
- Composite or PVC decking: Ideal for low maintenance, these materials offer excellent resistance to moisture and UV rays, making them suitable for long-term durability in Austin’s weather.
Opting for high-quality, weather-resistant materials improves deck longevity and reduces repair and maintenance costs over time. Consult an expert to select materials that best suit your needs and climate.
Preparing the Site for Deck Installation
Assessing the Location
Choosing the right location for your deck is crucial for its functionality and safety. Key factors include:
- Sunlight Exposure: Consider the amount of sunlight the area receives, as this affects the comfort and durability of your deck. For example, decks in direct sunlight may benefit from built-in shading, while decks in shaded areas may require materials resistant to moisture buildup.
- Drainage: Ensure the site has proper drainage to prevent water pooling, which can weaken the foundation and cause structural damage over time.
- Space and Access: Confirm that there is enough room for the deck’s intended size and that it has convenient access from your home—plan for pathways, entrances, and any potential obstacles.
Clearing the Area
Before construction, clear the site of debris, vegetation, rocks, or other obstructions. This step creates a stable base for the foundation and prevents future issues like shifting or sinking.
- Level the ground as much as possible to ensure a stable foundation.
- Remove any large roots or rocks that could disrupt the installation process.
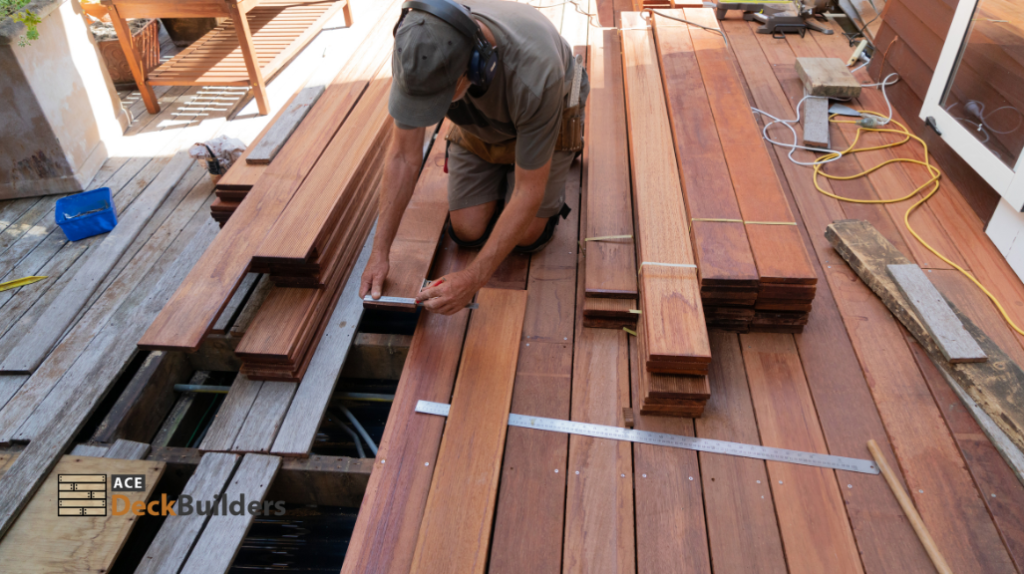
Marking the Layout
Accurate layout marking is essential to ensure the deck fits as intended. Use stakes, string, and a measuring tape to define the deck’s boundaries. This step lets you visualize the deck’s size and ensures it aligns with the design plan. Proper decking installation involves laying out and securing decking boards with precise gaps for drainage and trimming for a professional appearance.
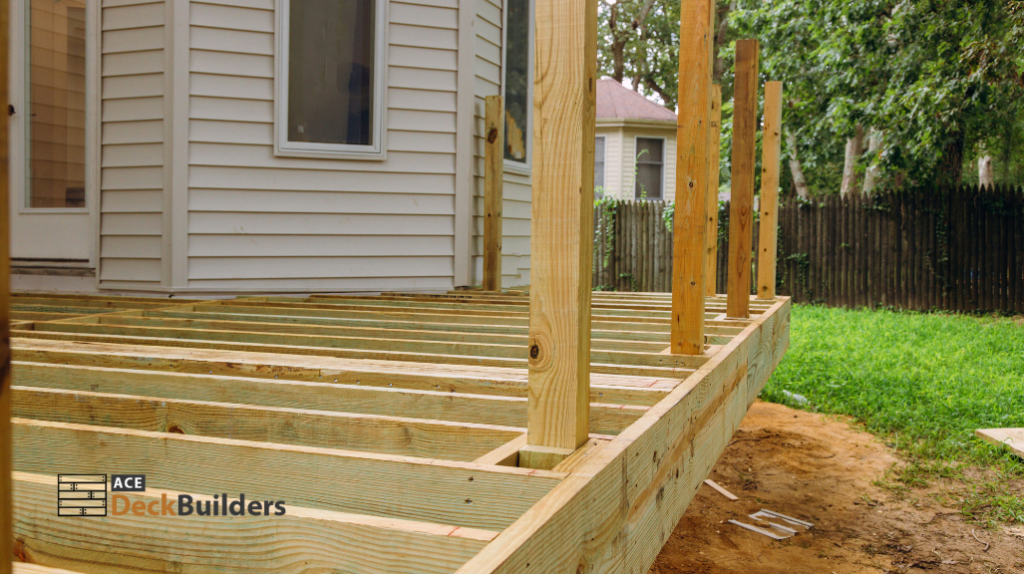
Installing Footings and Posts
Installing footings and posts is critical in the deck building process, providing the foundation for the entire structure. Begin by digging holes for the footings to the required depth, which varies depending on local codes and soil type. Fill the holes with concrete, set the post anchors, and place the posts into position, making sure they are level and properly aligned. The posts provide vertical support for the entire structure, so take extra care to ensure they are stable and secured.
Use pressure-treated lumber for the posts, as it is insect-resistant, rot-resistant, and cheaper than other wood types. Follow local building codes and regulations regarding footing depth, post spacing, and anchoring systems. Installing footings and posts correctly ensures a sturdy and long-lasting deck that will withstand the elements and heavy use.
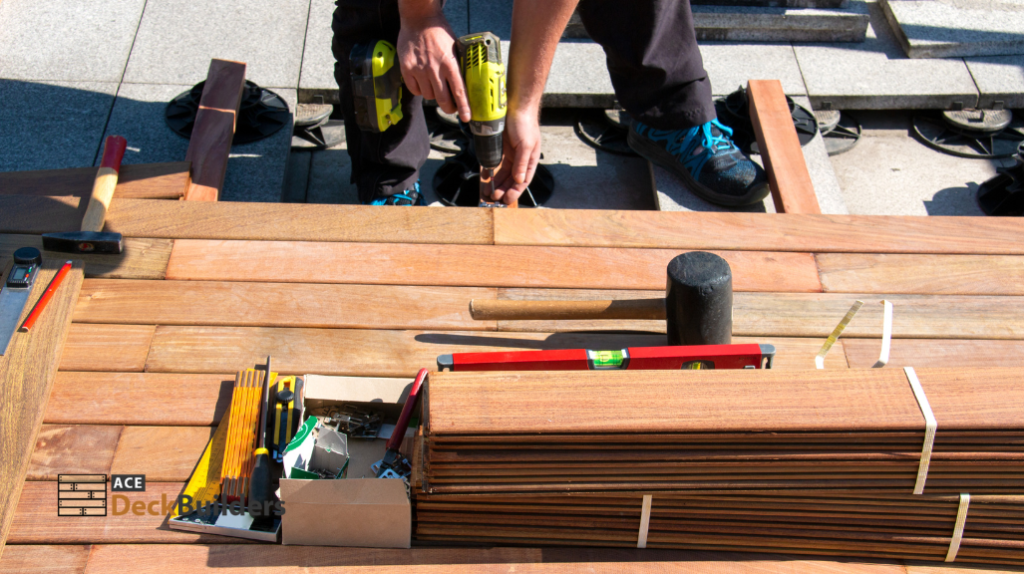
Gathering Tools and Materials
Essential Tools and Materials
Gathering all the necessary tools and materials beforehand ensures a smoother installation process. Tools you’ll need include:
- Power tools: Circular saw, post-hole digger, power drill, and measuring tape.
- Safety gear: Gloves, goggles, work boots, and protective clothing.
Prepare all deck materials, including deck boards, screws, framing lumber, concrete, and hardware, before beginning the installation.
Safety Gear and Precautions
Safety should be a top priority during deck installation. Wear gloves to protect your hands, goggles for eye safety, and work boots to avoid injuries from nails or heavy materials. If you’re unsure about handling specific tasks, hire a professional to ensure safety and quality.
Scheduling Professional Help
When to Hire a Professional
While DIY projects can be rewarding, some aspects of deck installation require professional expertise. Consider hiring a professional for:
- Foundation setting: Ensures structural stability and compliance with building codes.
- Framing: Proper framing ensures the deck’s strength and safety, especially for multi-level designs.
- Electrical work: For features like deck lighting or electrical outlets, hire a licensed electrician.
Working with experienced contractors guarantees a high-quality, code-compliant deck installation.
Final Pre-Installation Checklist
Before starting construction, use this final checklist to ensure everything is ready:
- Confirm permits and building code compliance.
- Verify all tools and materials are on-site.
- Double-check measurements and layout.
- Ensure the site is fully prepared and cleared.
Reviewing this checklist helps prevent errors, ensuring a successful installation process.
Common Preparation Mistakes to Avoid
- Mistake 1: Failing to obtain the necessary permits.
- Solution: Research local requirements and secure permits before avoiding legal issues and fines.
- Mistake 2: Inadequate site preparation, leading to structural issues.
- Solution: Properly clear and level the area to create a stable base for the foundation.
- Mistake 3: Choosing low-quality materials to save costs.
- Solution: Invest in durable, weather-resistant materials that enhance the deck’s lifespan.
Finishing Touches
The final step in the deck building process is adding finishing touches and establishing a maintenance routine to keep your deck looking its best. Sand any rough edges, apply sealant or stain to wooden decks, and install trim to cover exposed ends. If you’re using composite or PVC decking, a simple wash will prepare the surface for use. Consider adding features like built-in lighting, planters, or a pergola to enhance the functionality and aesthetics of your deck.
Regular maintenance is essential to extend the lifespan of your deck. Inspect the deck regularly for signs of damage, rot, or insect infestation, and address any issues promptly. Keep the deck surface clean and clear of debris, and apply a sealant or stain as needed to protect the wood from the elements. You can enjoy your new deck for years by following these simple steps.
Maintenance and Upkeep

Regular maintenance and upkeep are crucial to extending the lifespan of your deck and ensuring its safety and functionality. Here are some tips to help you keep your deck in top condition:
- Inspect the deck regularly for signs of damage, rot, or insect infestation, and address any issues promptly.
- Keep the deck surface clean and clear of debris, and apply a sealant or stain as needed to protect the wood from the elements.
- Check the deck’s structural elements, including footings, posts, beams, and joists, for signs of damage or deterioration.
- Consider applying a waterproof sealant to the deck surface to protect it from moisture and extend its lifespan.
- Keep the deck’s railings and balusters secure and in good condition, and promptly replace any damaged or rotten components.
Following these simple maintenance and upkeep tips, you can enjoy your deck for years and ensure its safety and functionality.
Preparing for Your Deck Installation
Proper preparation is the cornerstone of a successful deck installation. From defining the deck’s purpose and setting a realistic budget to selecting suitable materials and preparing the site, every step is crucial in ensuring a smooth and lasting build.
By planning, you not only improve the quality of the installation but also create a space that meets your specific needs and enhances your lifestyle. Whether you’re building a cozy retreat or a grand entertainment area, preparation sets the stage for a deck that adds value and enjoyment to your home.
If you’re ready and want to hire a professional Austin deck builderto start planning your deck installation, contact Ace Deck Builders for expert guidance and professional consultation. Let us help you turn your vision into reality with a custom-built deck designed to last.