
TL;DR
Austin decks live under high UV, long hot spells, and pop-up storms. The best designs prioritize: (1) shade zoning over the most-used square footage, (2) light-tone, textured surfaces for cooler comfort, (3) ventilated framing and skirting, (4) smart drainage and footing strategy, and (5) rail/stair details that feel sturdy, safe, and breezy. Start with a sun map of your yard, pick one core-material lane, and design a layout that sequences inspection-ready structures before finishes. For a benchmark of process and craftsmanship in Central Texas, browse the portfolio and standards on Ace Deck Builders, which are especially appealing to austin homeowners.
Austin’s Climate: What Your Deck Has to Survive
Design starts with the physics of deck building :
- Intense UV & heat: dark, dense surfaces get hot; unshaded rail caps can scorch.
- Sudden storms —wind-driven rain, quick downpours, and expansion/contraction cycles — stress connections.
- Clay-heavy soils: footing depth/diameter and post bases matter for long-term stability.
- Pollen & dust: finishes and textures that hide grime —so you can save your weekends.
A great plan isn’t just beautiful—it manages heat and water, and it’s built around inspection “hold points” so structure gets checked before finishes hide it.
Step 1: Map the Sun and Wind (Then Place Your Zones)
Do a simple sun map for one week—note where the deck bakes noon–6 pm and where prevailing breezes come from. Then place zones:
- Core dining zone in partial shade, near the kitchen door to minimize hot-foot travel.
- Lounging zone where the evening breeze hits; consider a pergola section or sail.
- Grill/kitchen positioned downwind of the seating zone to keep smoke off guests.
- Play/pet area with a cooler surface and some afternoon shade.
If your space allows, separate “hot tasks” (grill) from “cool relax” (shade + fan) with a low divider or a half-step change in elevation.
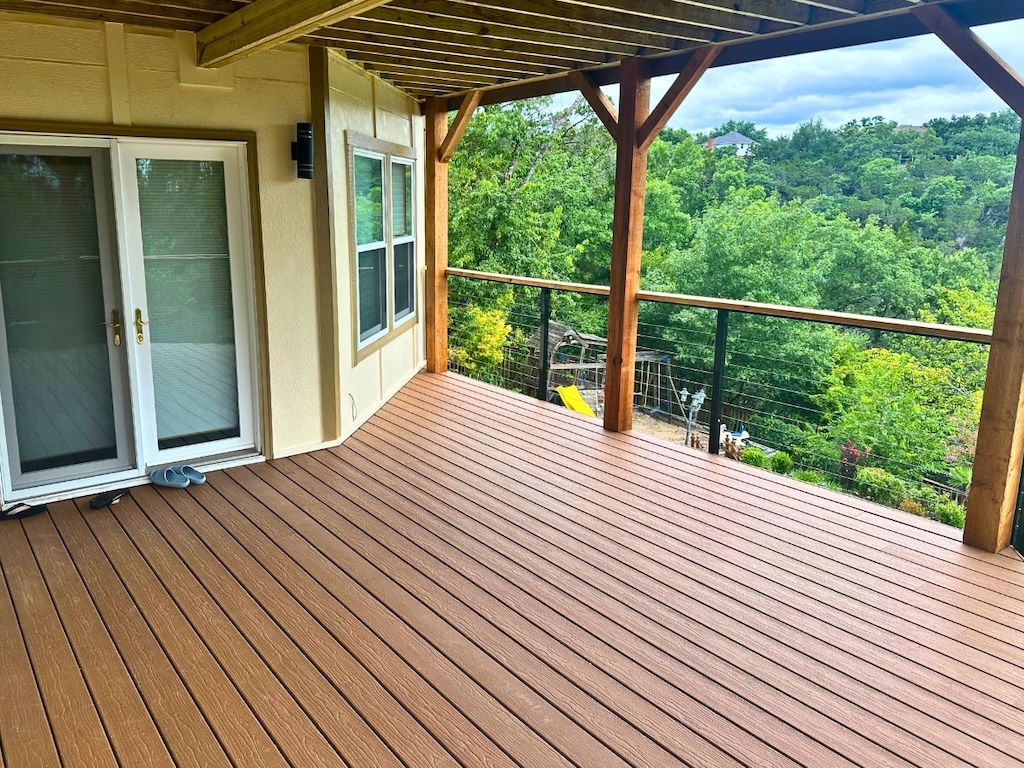
Step 2: Choose a Layout That Breathes (Single-, Split-, or Multi-Level)
Single-level, wide, and shallow
- Works for ranch-style homes and sliders; leaves room for a picture-frame border that helps control movement.
- Best when your yard already has distinct shade/sun zones without using steps.
Split-level (half-step changes)
- A half-step drop visually separates cooking from lounging without creating trip hazards.
- Useful for taming minor grade changes and guiding traffic around a pool or lawn feature.
Multi-level
- Ideal for sloped yards, poolside transitions, or when you want a sunrise coffee deck and a sunset lounge.
- Requires precise stair geometry and rock-solid rail post blocking; structure is the hero here.
If you’re on a tight lot but want a big-deck feel, consider using composite decking alongside depth compression (the shorter dimension off the house) and visual width tricks (a diagonal board field with a border) to make the space read larger.
How is a multi- or split-level build staged for inspections and structural work? Mid-research, skim a process walkthrough of deck installation in Austin to see drawings, permits, and framing “hold points” before finishes start.
Step 3: Shade That Works—Pergolas, Sails, and Rooflines
Shade is the single highest-impact comfort upgrade in Austin, especially for outdoor spaces .
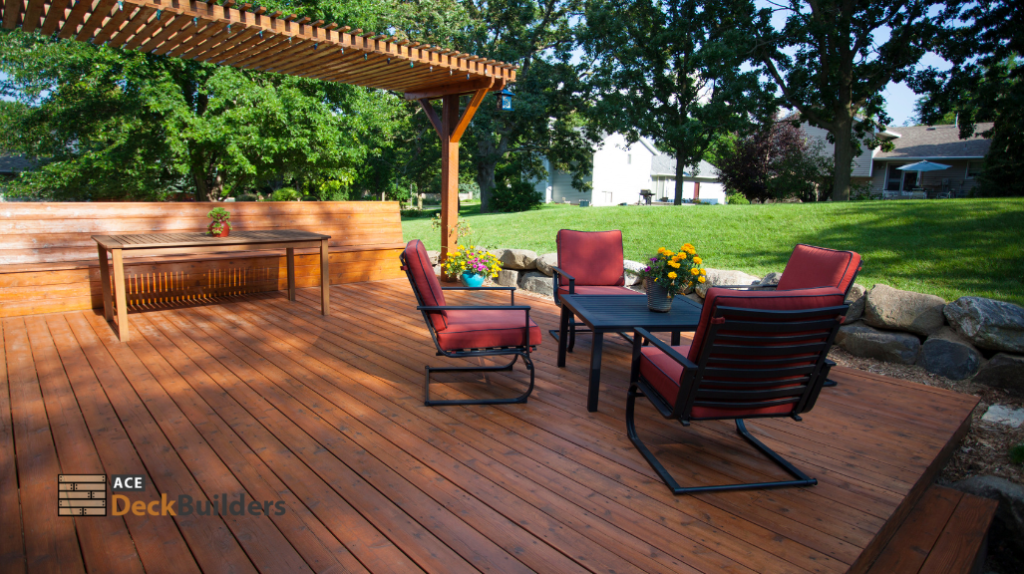
- Pergolas add architectural interest and visible “room” edges. Use adjustable slats or a partial cover over the dining/seating area.
- Shade sails are budget-friendly and flexible—great for experimenting before you commit to a permanent structure.
- Extended rooflines (or covered porches) demand careful flashing and often structural steel—worth it when you want authentic indoor–outdoor living.
Place shade where people actually linger. A small, perfectly placed pergola over a couch set does more than shade the whole deck with a heavy roof.
Step 4: Surfaces That Stay Comfortable (Color, Texture, and Pattern)
Color: Lighter tones run cooler, particularly if paired with wood decking . If you love charcoal aesthetics, keep the field light and use dark accents (like a picture frame or rail caps).
Texture: Matte, embossed finishes read cooler and hide dust/pollen better than glossy caps. On stairs, choose a texture that’s friendly to bare feet but grips when wet.
Pattern:
- Picture-frame borders sharpen edges and let you control expansion.
- Divider boards break long runs to maintain consistent gaps and minimize waste.
- Diagonal fields visually widen small decks—but plan tighter joist spacing per board specs.
Step 5: Drainage, Footings, and Ventilated Skirting
Water will visit; give it a path:
- Footings sized for load and soil; the inspector checks depth/diameter before pour.
- Ledger flashing tied into the house weather barrier; tape/membrane at critical interfaces where specified.
- Ventilated skirting to keep airflow under low decks; solid wraps without vents trap heat and moisture.
- Gutter thinking: use borders and downspout awareness to prevent splashback and mud stripes along the house.
A dry, breathing deck lasts longer and stays cooler.
Step 6: Rails, Stairs, and Views (Safety Without the Bulk)
Rails shape both budget and experience:
- Picket rails are value-friendly and classic; paint or cap with a light tone to avoid hot handrails.
- Cable rails keep views open and breezes flowing, but add hardware cost and tensioning labor.
- Glass rails are beautiful in sheltered areas; plan for cleaning and glare.
Stairs should have a consistent rise/run, sturdy landings, and graspable handrails. On west-facing stairs, use lighter treads and consider a small canopy or tree shade.
Step 7: Lighting That’s Useful in 100° Heat
Heat begs for low-heat, low-glare lighting:
- Directional, dimmable LEDs on posts for safety without hot spots.
- Riser lights on stairs for nighttime visibility.
- Warm temperatures (2700–3000K) keep it cozy; avoid blue-white glare that fights the Texas ambiance.
- Put deck and landscape lighting on separate circuits so you can keep the yard glowing while the deck stays calm.
Design Patterns We Recommend (Use Cases)
Pattern A: The West-Facing Entertainer (Evening Sun, Big Views)
- Layout: Split-level—grill station up top; lounge ½-step down to preserve sightlines.
- Shade: Compact pergola over lounge with slats oriented to block low-angle evening sun.
- Surface: Light-tone composite or PVC with matte embossing; picture-frame border + divider boards.
- Rails: Cable for airflow and views; light rail cap to manage heat.
- Drainage: Border channeling away from doors; ventilated skirting on the lower level.
Pattern B: Poolside Cool (Splash Zone & Bare Feet)
- Layout: Single-level wrap that keeps walkways generous around the water.
- Shade: Sail or partial pergola near chaise set; coordinate with pool equipment setbacks.
- Surface: PVC in a light tone; stainless fasteners/hardware near splash.
- Rails: Pickets or powder-coated aluminum; emphasize grippable stair rails.
- Details: Anti-slip attention on treads; skirting vents to keep humidity from lingering.
Pattern C: Hill Country Slope (Views + Grade Change)
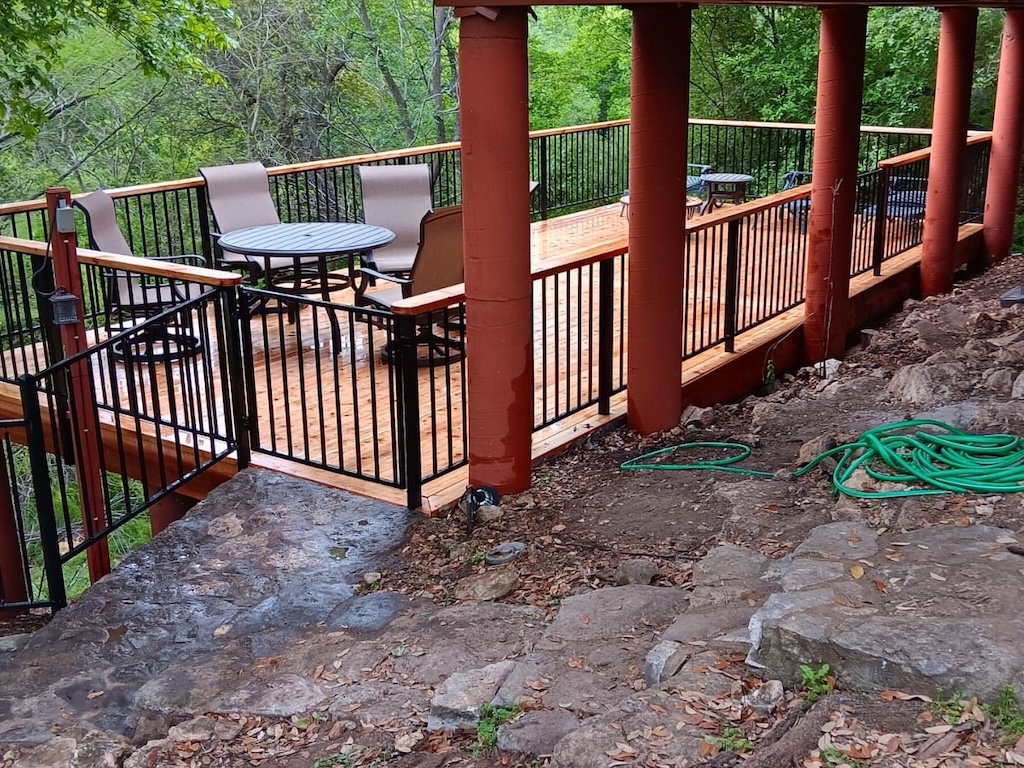
- Layout: Multi-level with a breakfast deck up top and a lower lounge tucked from the wind.
- Shade: Pergola at upper level; trees or screens at lower seating.
- Surface: Light-tone composite; diagonal field up top to widen feel; straight field below for budget.
- Rails: Mix pickets (budget) and a cable run at the view-facing edge.
- Structure: Extra attention to footings and bracing; inspection-friendly exposure before decking.
If you’re leaning toward a tiered or roof-adjacent concept, get a feel for structure-first planning with a quick look at multi-level deck installation and how builders sequence joists, blocking, and rail posts on stepped layouts.
City views or tight footprints upstairs? Explore the considerations, flashing, and hold points that come with rooftop deck installation—great for breezes and skyline, but detail-heavy for long-term performance.
For aesthetic inspiration and what’s trending locally in colors, borders, and rails, flip through the top deck design trends for Austin and cherry-pick what fits your sun map.
Budget Moves That Don’t Hurt Performance
- Spend on shade first: a small pergola over the lounge beats premium boards in full sun.
- Simplify rails: pickets where views don’t matter; reserve cable/glass where they do.
- Consolidate stairs: one well-placed run costs less than multiple nubs.
- Standardize dimensions: align to 12-, 16-, or 20-ft board lengths to reduce waste.
- Use a two-tone strategy: premium border + mid-line field reads upscale without premium everywhere.
FAQs
Get an Austin-Ready Design
Want a deck that feels cooler, stronger, and easier to live with—designed around your actual sun, wind, and lifestyle? Start with a free deck estimate in Austin, and we’ll map your sun exposure, bring samples for heat testing, and produce an itemized plan with inspection hold points you can trust.