
TL;DR
The best entertaining decks in Austin are designed around comfort, flow, and function. Start with a simple sun map to place shade where people actually linger (5–8 pm is the real test), choose light-tone, textured surfaces for better barefoot comfort, and consolidate stairs to one well-placed run that matches how guests naturally move. Built-in expandable seating (benches, wide step edges), layered, dimmable lighting, and enough power for speakers, coolers, and cooking. Ventilated skirting, inspection-ready structure, and clearly defined allowances in your quote protect your budget and schedule. For a look at process standards and craftsmanship locally, you can explore Ace Deck Builders.
Why Austin Entertaining Demands Specific Design Moves
Austin decks live under intense UV, long, hot afternoons, and pop-up storms. If a design is only pretty on a mood board, it will disappoint at 6:30 pm in July. The must-have moves aren’t flashy: targeted shade, ventilated skirting, clear walk paths, and layered, dimmable lighting. Get these right and the add-ons—benches, planters, bar shelves—actually get used. The yard becomes “the good room,” not a scatter of hot chairs.
A mindset shift helps: design from the peak-use window (5–8 pm). Ask, “Where will guests stand, talk, and put their drinks during the hottest hour?” Place comfort there, not wherever a rendering looks dramatic.
Step 1: Map the Party (Zones, Flow, Capacity)
Sketch your deck and note the sun path and prevailing breeze for a week. Then place four core zones:
- Lounge Zone — Conversation anchor with soft seating. Aim for 12–14 ft clear width so a coffee table and foot traffic can coexist.
- Dining Zone — Leave 36–42 in. around chairs for pull-back and passing.
- Cooking Zone — Define a hot triangle (grill + prep + landing) that doesn’t cut off the route to the table or yard.
- Drinks/Service — A bar ledge, cart, or short counter where guests can grab refills without walking through smoke.
Flow rules that keep parties smooth
- Keep main aisles ≥42 in. so trays and strollers don’t collide.
- Avoid dead-end corners behind chairs.
- Consolidate stairs to one purposeful run with a landing placed where everyone already heads (toward lawn, pool, or side gate).
- If kids or pets will be present, keep the play path outside the cooking triangle and plan a gate option at the stair top.
Step 2: Beat the Heat (Shade, Color, Texture, Air)
Comfort comes from three levers—shade, surface, and air—working together.
- Shade where people linger: A compact pergola over a lounge or dining creates more usable hours than spreading the budget across premium boards. Unsure of placement? Test angles with a shade sail for a month, then commit.
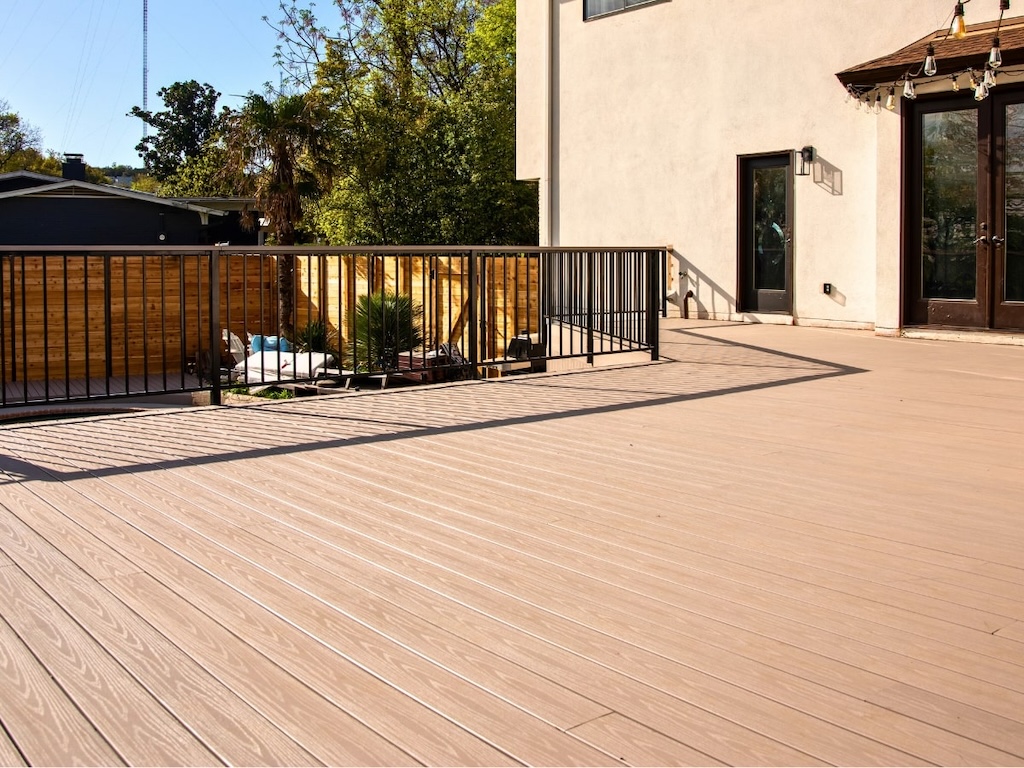
- Light surfaces: Light grays/tans feel noticeably cooler at 5 pm than charcoals. Use darker tones only as accents (picture-frame borders, small steps) that hands/feet won’t linger on.
- Matte, embossed texture: Feels less sticky and hides dust/pollen better than gloss.
- Air movement: Keep a low-visual-weight rail on the breeze side; add a ceiling fan under a pergola for instant relief.
- Ventilated skirting: Low decks must breathe. Solid wraps trap heat and moisture, cooking your food and shortening its lifespan.
(Planning a complete build or overhaul? Suppose you want a clean, inspection-ready sequence from drawings to the final pass. In that case, it’s worth reviewing the cadence and expectations you should request in your contract—details many homeowners first encounter when comparing a professional deck installation in Austin proposal.)
Step 3: Seating That Scales Without Clutter
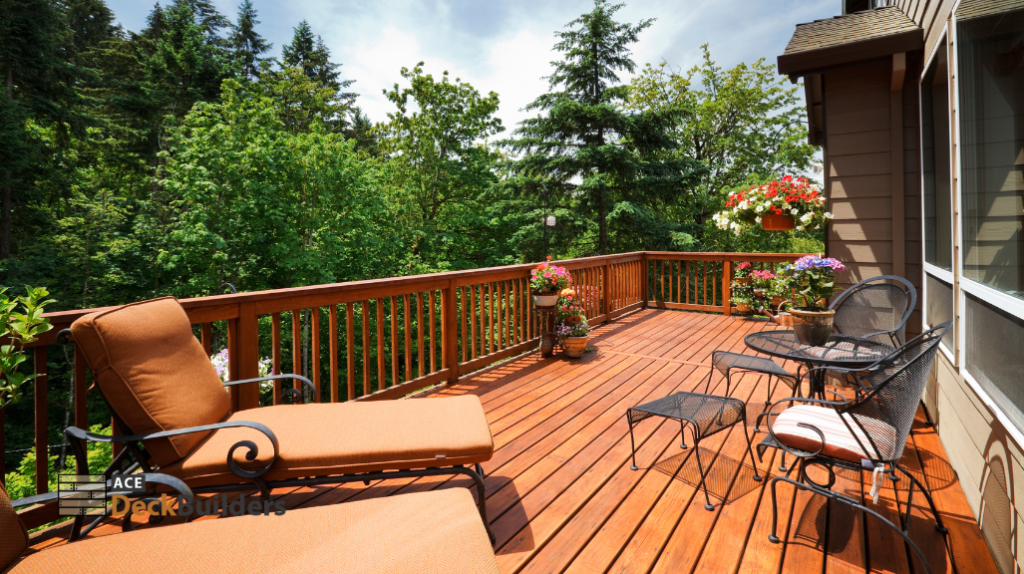
Hosts rarely regret extra places to perch—they regret extra chairs underfoot.
- Built-in benches along one edge accommodate “plus-four” guests and can reduce rail-footage costs.
- Wide step edges double as casual seating; place a low table near one step to “invite” people to sit.
- Modular lounges let you pivot for birthday parties vs. movie nights.
- Bar ledges near the grill keep talkers close without clogging the hot zone.
If you entertain often, reserve a 6–8 ft service alley along the wall for platters and coolers—out of the main traffic lane but within arm’s reach.
Step 4: Cooking, Bars, and Drinks—Right-Sizing the Hot Zone
Great outdoor kitchens feel effortless, not oversized.
- Minimum viable setup: a stable grill pad, heat-shielding at house interfaces, a GFCI outlet, and a 24–30 in. clear landing surface for trays.
- Add-ons that matter: pull-out trash, a drawer for tools, and a small bar shelf so drinks don’t keep landing on the chair arms.
- When to go big: weekly entertaining, long distance to the indoor kitchen, or multi-course cooking. Keep traffic patterns clear—bar traffic should never cut through the hot zone.
- Bar ergonomics: a 12–15 in. overhang gives elbows space while keeping aisles open; place it between the lounge and dining so it serves both without bottlenecks.
Step 5: Lighting That Makes Evenings Effortless
Party lighting is about layers and control:
- Safety layer: low-glare riser LEDs on stairs and subtle post lights at corners.
- Task layer: focused illumination at the grill and bar.
- Ambient layer: warm (2700–3000K) glow along the perimeter and lounge.
- Simple controls: put deck, landscape, and task lights on separate circuits. One tap from “cook mode” to “conversation” keeps nights chill.
Step 6: Audio, Power, and Simple Controls
If the tech disappears into the background, you nailed it.
- Audio: Four small, evenly spaced speakers beat one loud box. Mount under a pergola/eave to keep sound contained.
- Power: Outlets at the lounge, bar, and a corner for string lights or heaters—placed so cords don’t cross paths.
- Scenes: A single “Evening” preset that dims lights and sets volume is future-you thanking present-you.
Step 7: Stairs, Rails, and Safety—Invisible but Essential
Safety that doesn’t announce itself is the best kind.
- One primary stair with a proper landing is safer (and cheaper) than multiple tiny runs.
- Graspable handrails on stairs, rail heights to code, and properly blocked posts eliminate wobble.
- View edges: cable or slim pickets preserve breeze and sightlines; keep rail caps light-tone where hands rest in the sun.
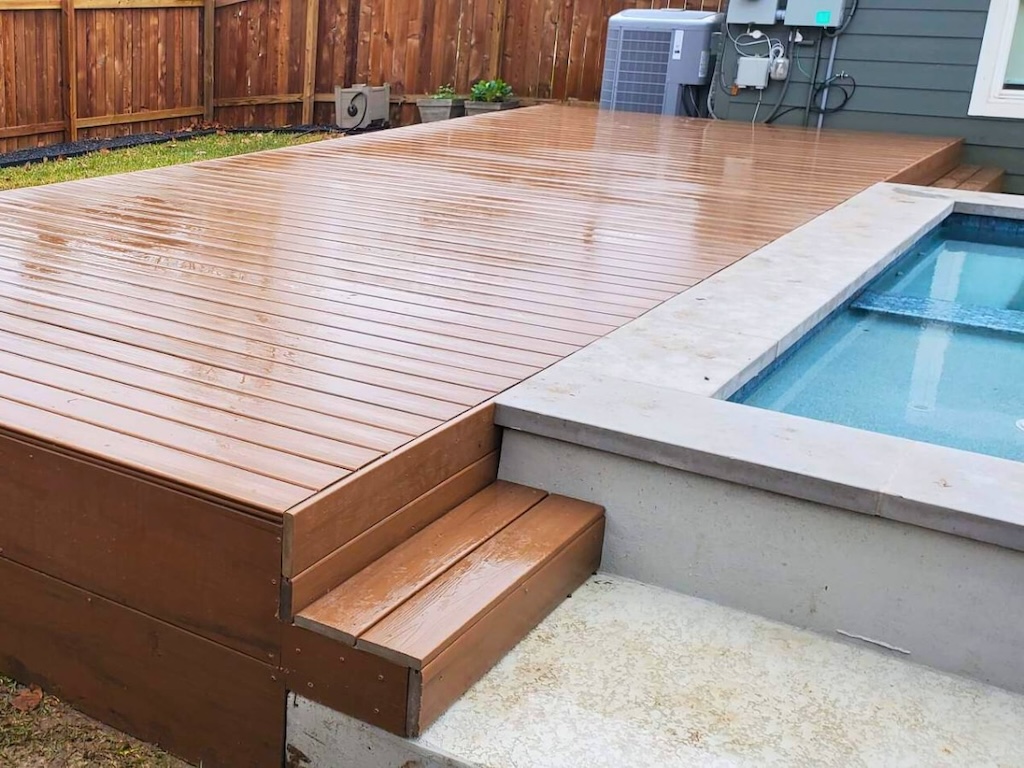
(Design decisions can snowball when water is nearby. If your entertaining happens around a splash zone, double-check slip awareness, stainless hardware, and shade placement learned from a professional pool deck installation plan.)
Step 8: Surfaces for Barefoot Comfort (and Fewer Regrets)
Bare feet are the best critics.
- Light-tone, matte/embossed surfaces (composite or PVC) feel better from late afternoon through sunset.
- Two-tone field + border sharpens edges and controls board movement on long runs.
- Poolside: textured treads and stainless fasteners near the splash extend life and safety.
Step 9: Privacy, Wind, and Neighbor-Friendly Design
Create intimacy without killing airflow.
- Screens where needed: focus on the windward side or a direct neighbor sightline rather than boxing the deck.
- Green privacy: tall grasses or clumping bamboo in slim planters soften edges and absorb sound.
- Eye-line control: a 42–48 in. planter or slatted screen near the dining can block a neighbor’s window without turning your deck into a tunnel.
Step 10: Storage, Cleanup, and Fast Event Turnover
You’ll host more if setup and cleanup are easy.
- Bench storage swallows cushions and lanterns.
- Hooks/rails manage grill tools, towels, and extension cords.
- Rinse path that doesn’t drag a hose across stairs; keep vent openings in skirting clear.
(Before locking colors and borders, it’s smart to skim local inspiration that actually holds up in the sun. Homeowners often pick better, cooler combinations after browsing recent deck design trends and then testing a few sample boards on their own steps.)
Three Sample Layouts (Copy These)
Layout A: “Weeknight Hang” (12×18 to 12×20)
- Zones: 70% lounge / 30% grill pad.
- Shade: compact pergola over lounge oriented to late-day sun.
- Seating: sectional + two chairs; bench along one rail edge for overflow.
- Lighting: riser LEDs + two low-glare post lights + a grill task light.
- Flow: one central stair to the lawn so guests don’t cross the hot zone.
Layout B: “Game Day & Birthday Central” (14×24 split level)
- Upper: grill and counter with a short bar ledge (4 stools).
- Lower: modular lounge; wide step between levels doubles as a perch.
- Shade: sail over lower seating; fan under upper pergola.
- Power/Audio: outlets at the bar and lounge; four small speakers evenly placed.
- Flow: corner stair nearest gate/pool with a landing.
Layout C: “Poolside Entertainer” (wrap with water access)
- Surface: light-tone PVC; stainless hardware near splash.
- Rails: slim pickets with cable on the view edge for airflow.
- Shade: pergola over chaise cluster; optional misters along the beam.
- Safety: textured stair treads; handrails that are graspable.
- Storage: bench for towels and sunscreen near the pool gate.
Budget Levers (Spend Here, Save There)
Spend where you feel it every visit
- Shade over the most-used seating zone
- Light-tone, textured surfaces for comfort
- Dimmable lighting on separate circuits
- One well-placed stair with a good landing
Save without hurting the vibe
- Use picket rails everywhere; reserve cable/glass for one view edge
- Keep the kitchen to a grill pad + counter unless you genuinely need appliances
- Choose a two-tone border with mid-line field boards instead of premium everywhere
- Phase extras (screens, planters, benches) after you live with the space for a season
Maintenance & Longevity (So It’s Party-Ready Next Season)
- Rinse quarterly; soap scrub before big weekends.
- If wood, keep a 12–24 month stain/seal cadence based on sun exposure.
- Keep skirting vents clear; don’t lean solid storage against them.
- Annual check: tighten rail posts and stair fasteners; refresh sealants at the house interface as needed.
- Photograph ledger flashing, rail blocking, and stair details during the build—handy for future upgrades or warranty questions.
FAQs
Plan Your Entertainer’s Deck (Free Estimate)
Ready to turn your backyard into Austin’s favorite hangout—with cooler surfaces, better flow, and lighting that flatters every photo? Start with a free deck estimate in Austin, and we’ll map zones, plan shade and lighting, and deliver an itemized, inspection-ready design that fits your crowd.